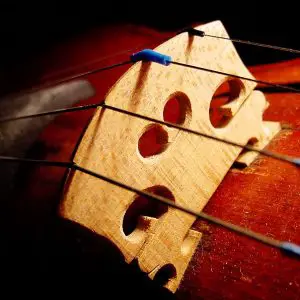
The bridge of your violin is an incredibly delicate part of the instrument itself. Which is precisely why bridge repair is all too often left to a trained violin repair specialist. While there are of course certain measures that you can take to repair the bridge yourself, caution must be taken in order to prevent further damage to the bridge itself, leading to a substantially costly repair.
If you are uncomfortable or have never carried out a bridge repair yourself, it is always better to be safe than sorry and simply take it to a shop. However, if you are confident that you can complete the repair yourself, here are some helpful pointers to aid you through the process.
Q: What are the most common issues in terms of bridge repair?
One of the most common issues in terms of bridge repair is having to adjust the bridge if it has toppled over for whatever reason. The bridge is held in place by the tension of the strings, and when it is properly fitted, the soundpost is just snug between the front plates and the back plates. The tightness of the post fits between these plates may vary by season, as the wood of the violin body alters its dimensions based upon fluctuations in humidity.
Additionally, removing the strings along with the bridge tension at the same time could cause a soundpost to topple over as well. This is something that should be left to a violin repair shop as they can measure the exact position of the soundpost and the bridge before the removal of the strings and bridge tension. If you are changing your own strings, be sure to only remove and replace one string at a time. This will ensure that you don’t disturb the proper position of the soundpost or bridge.
Q: What is the best way to change your strings?
The best way to change your strings is to do so one after another without the individual string play-in. You can install and lightly tighten the new strings, but don’t immediately tune them to pitch. Next, check the angle of the bridge and tighten the strings a little more. Always be familiar with the proper angle of the bridge and you should push the top of the bridge back as you keep bringing the strings up to the proper pitch. Always check the angle of the bridge each time you tune your strings, especially during the first few days of stretching the strings in.
Q: What is the safest way to adjust your bridge?
The safest way to adjust your bridge without pushing it over can be completed quite simply. To start, sit in a chair, placing the violin across your lap with the scroll to your left side. Your right index should extend under all four strings from the far side. And your left hand should be placed comfortably around the strings to the front of the bridge with your thumb at the center of the crest of the bridge between the two middle strings with your middle finger locked against the end of the fingerboard. Taking your right index finger, gently start to lift some of the tension of the strings off of the bridge. With your left thumb, carefully push-up on the upper edge of the bridge into the cushion of the right index finger to the required amount. Your finger lifting up will act as a stopping point so that the bridge can’t actually be pushed too far or over.
Q: What if I need to replace a new bridge?
If a new bridge is ever required to be replaced completely, it must be taken to a trained specialist. As repairs to the of the violin will typically need a new piece cut with total precision so that it can be seated with perfection.


